Virtual Machine -Actions

This page lists the various actions that may be executed by a user for a single Virtual Machine.

The Backup & Recovery's Virtual Machine page is primarily an informational page, presenting the user with a complete overview of everything related to their Virtual Machine. However, there are some actions that the user can take, which are detailed in the following sections of this page. There are four actions that may be executed for a single Virtual Machine:

Action - Create Backup and Snapshot

From the Backup & Recovery's Virtual Machine page:

  1. Identify the virtual machine from the list on which an action will be performed.

  2. Click the corresponding Actions button on the right side of the main UI window.

  3. From the menu displayed, select Create Backup if creating a Backup.

  4. Select "Create Snapshot" to take a snapshot.

  5. This section shows the available backup plans for the selected virtual machine. Check if any existing backup plans are available. If a suitable backup plan is found, select it; otherwise, proceed to Step 6 to create a new backup plan.

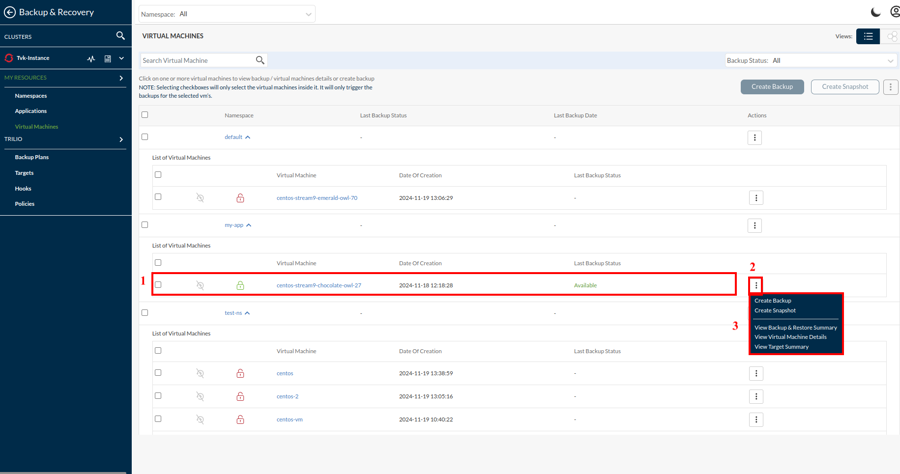
    Create Backup - Select Backup plan
    Create Snapshot - Select Backup plan
  6. If no existing plan is suitable, select Create New and follow the instructions in Create Backup Plans Note that if user create a new backup plan, it may take some time before it becomes available. Once the new backup plan becomes available, select it and proceed.

  7. Select Next.

  8. In the window displayed, type a meaningful name for new backup/snapshot

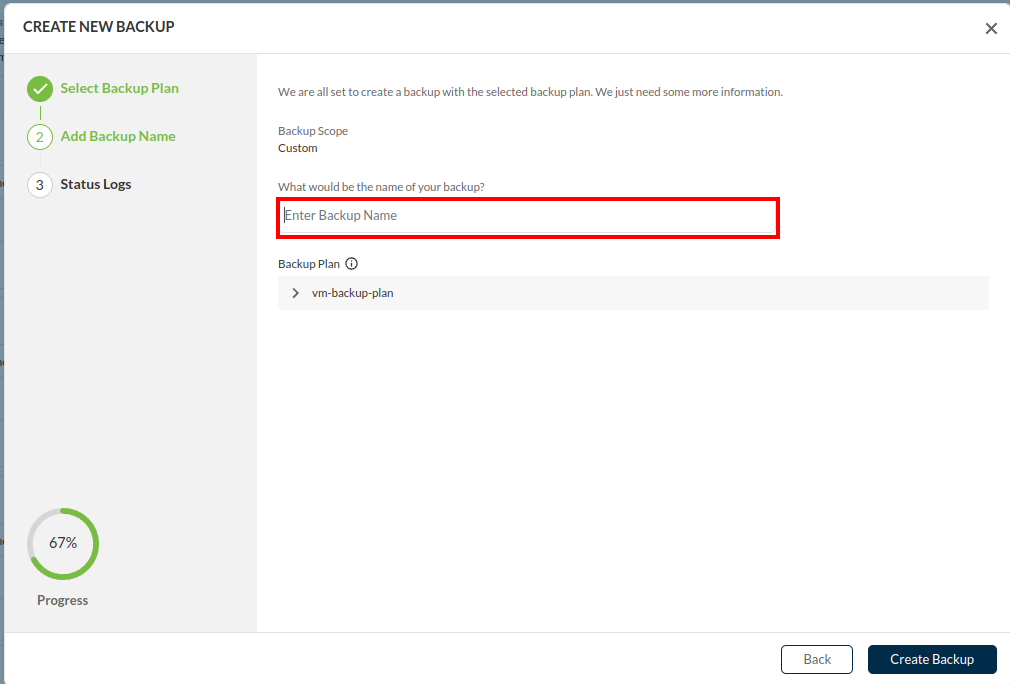
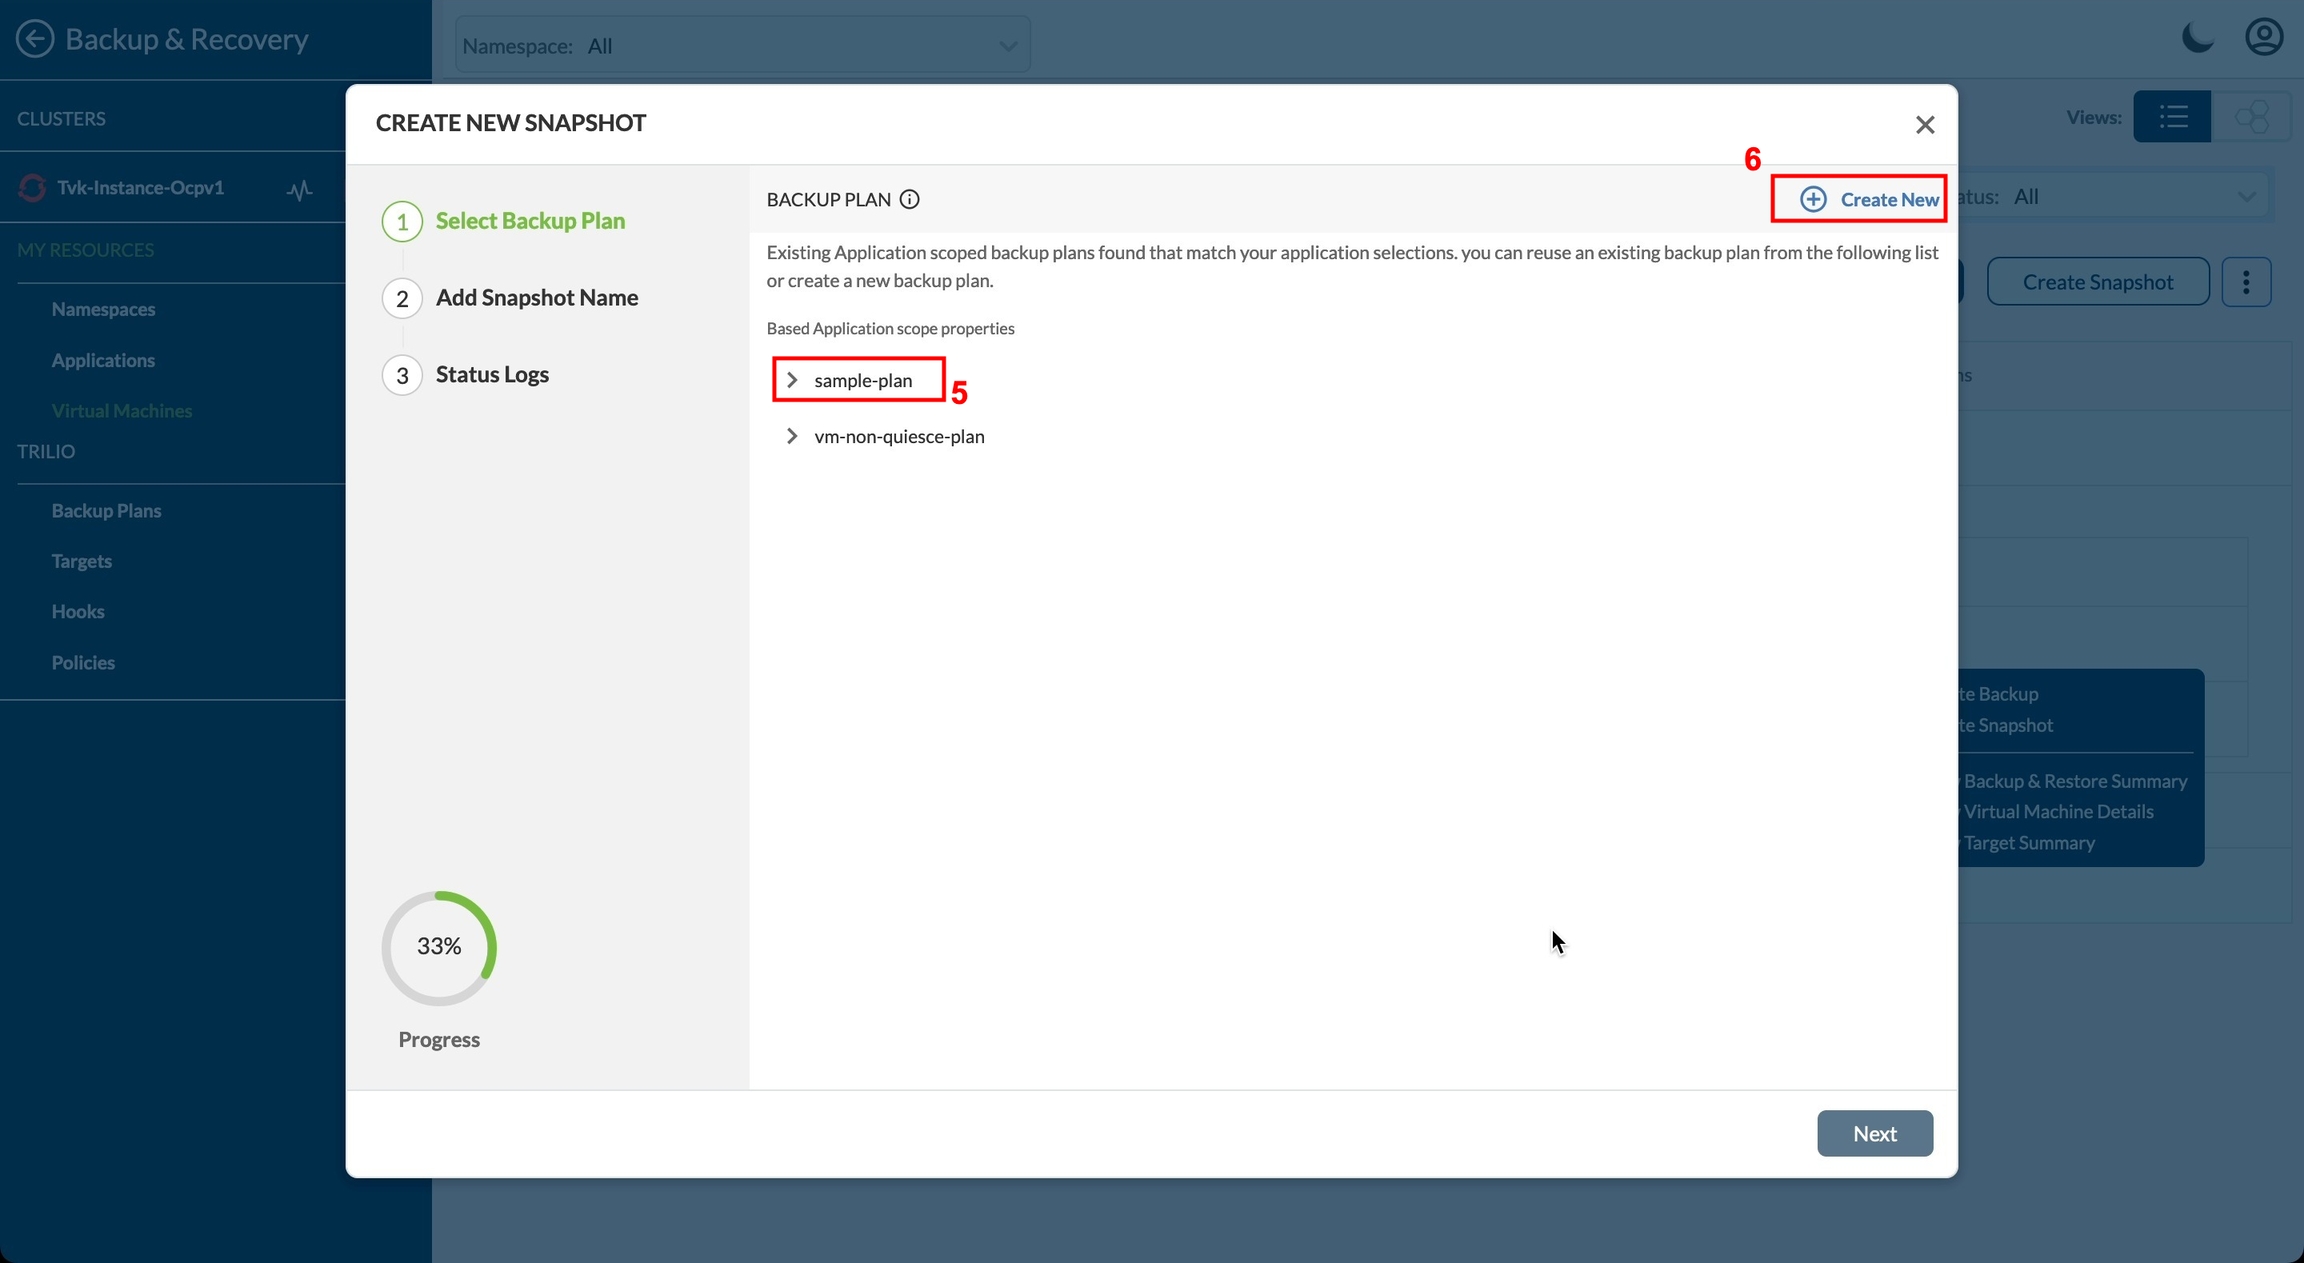
    Create Backup Options
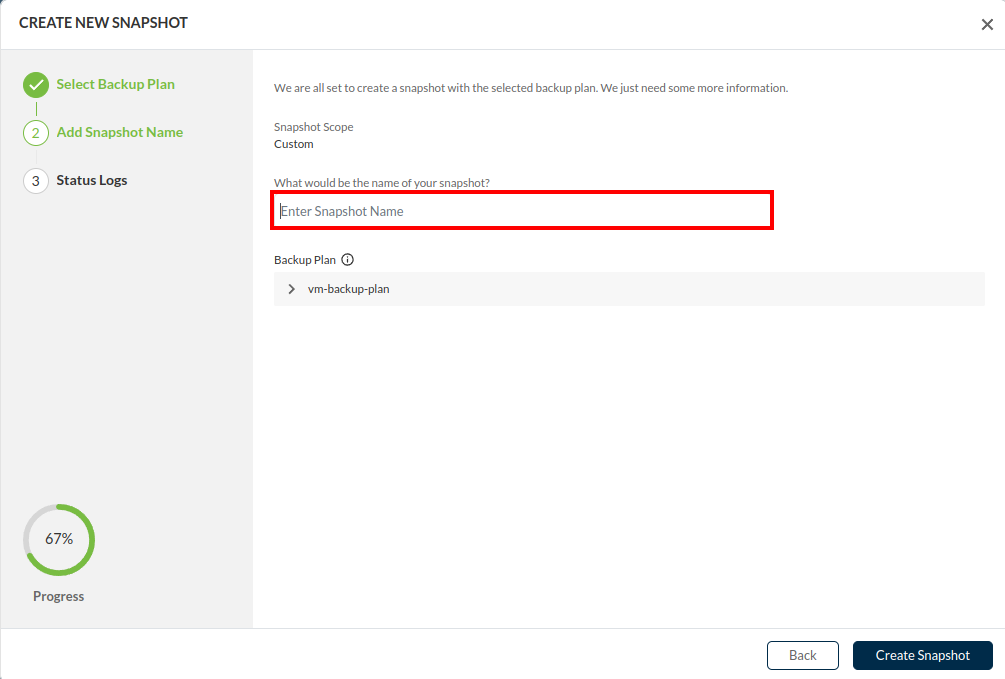
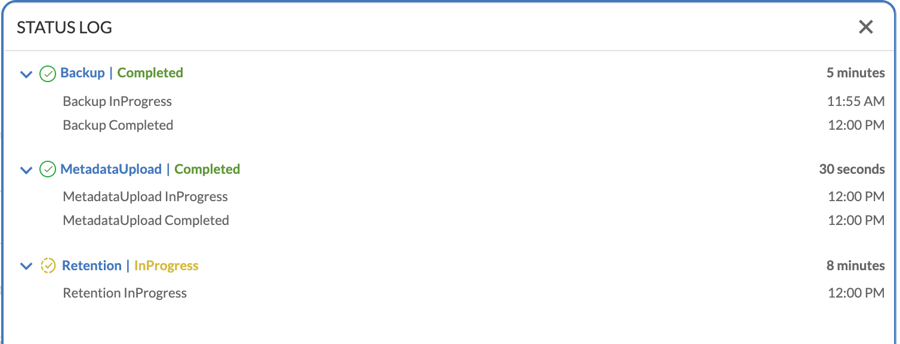
    Create Snapshot Options
  9. Then click Create Backup if you are taking Backup or click on Create Snapshot if you are taking Snapshot.

  10. Once the backup (/Snapshot) is complete, the STATUS LOG window displays, detailing the status of the backup (/Snapshot) and if there were any errors.

Actions - View Backup & Restore Summary

From the Backup & Recovery's Virtual Machine page:

  1. Identify the listed Virtual Machine for which an action is to be performed.

  2. Click the corresponding Actions button on the right side of the main UI window.

  3. From the menu displayed, select View Backup & Restore summary, which displays the Monitoring window.

  4. From the Monitoring window, optionally you may view the information provided in the BACKUP and SNAPSHOT creation. To see more Backup detail, click on Details from Backup chart section.

  5. To see more Snapshot detail, click on Details from Snapshot chart section.

  6. To see more Restore detail, click on Details from Restore chart section.

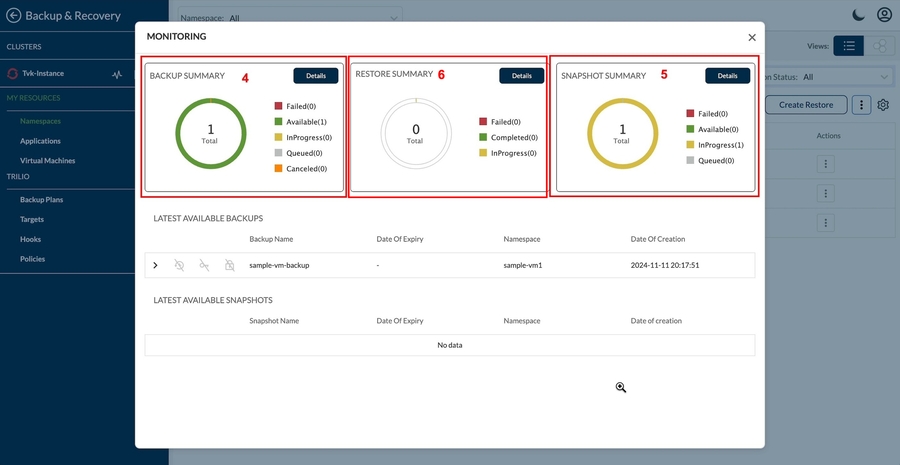
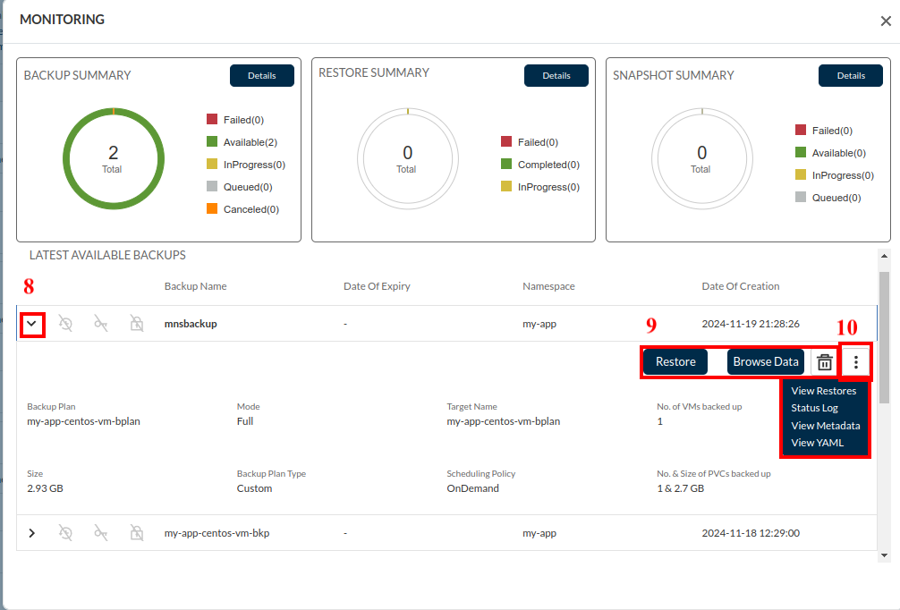
  7. In the Monitoring window, Latest Available Backups and Latest Available Snapshots details are listed in the table.

  8. To perform actions on these backups/snapshots, click the collapsible icon. This will expand further details about that specific backup/snapshot.

  9. To Restore, Browse Data or to Delete the backup/snapshot, use the respective action button.

  10. Click on Kebab menu (three horizontal dots). This dropdown will show all the actions that can be performed:

    1. View Restores

    2. Status Logs

    3. View Metadata

    4. View YAML

Actions -View Virtual Machine Details

From the Backup & Recovery's Virtual Machine page:

  1. Identify the listed Virtual Machine for which an action is to be performed.

  2. Click the corresponding Actions button on the right side of the main UI window.

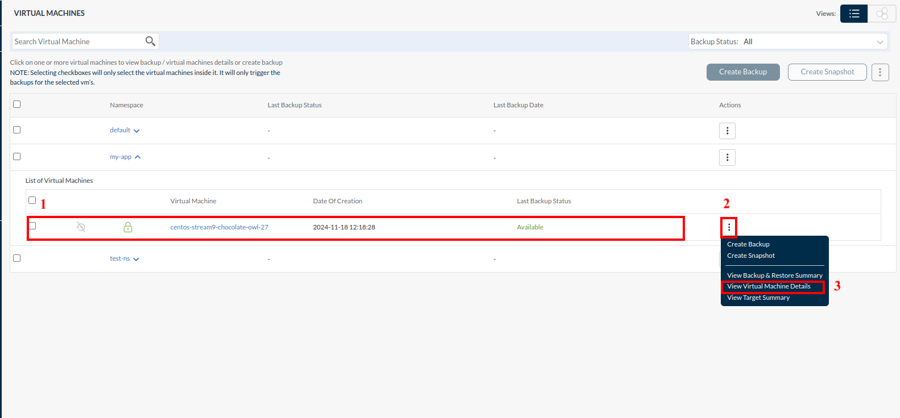
  3. From the menu displayed, select View Virtual Machine Details, which displays the following window***

Field
Description

a

This displays whether virtual machine is protected or unprotected.

b

This table dropdown lists all associated objects and the count for each. You can select each object to see more details.

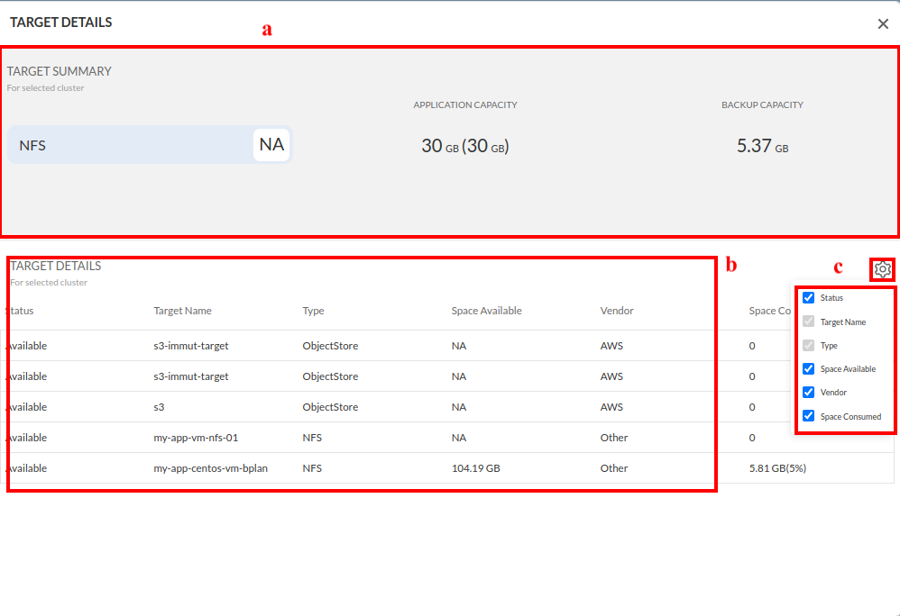
Actions - View Target Summary

From the Backup & Recovery's Virtual Machine page:

  1. Identify the listed Virtual Machine for which an action is to be performed.

  2. Click the corresponding Actions button on the right side of the main UI window.

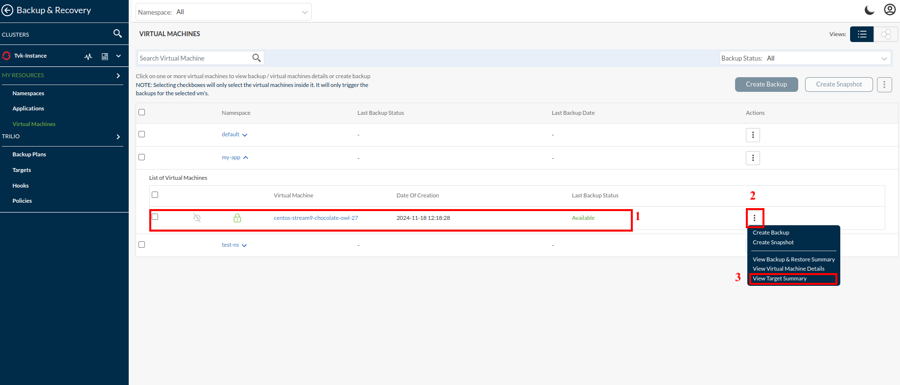
  3. From the menu displayed, select View Target summary.

Field
Description

a

The total space consumed by all selected targets. This includes nfs and object stores or other vendors targets in that particular Namespace.

b

This table lists the targets and displays the space that they each consume.

c

This setting icon allow you to select the columns visibility from listing.

Last updated

Was this helpful?