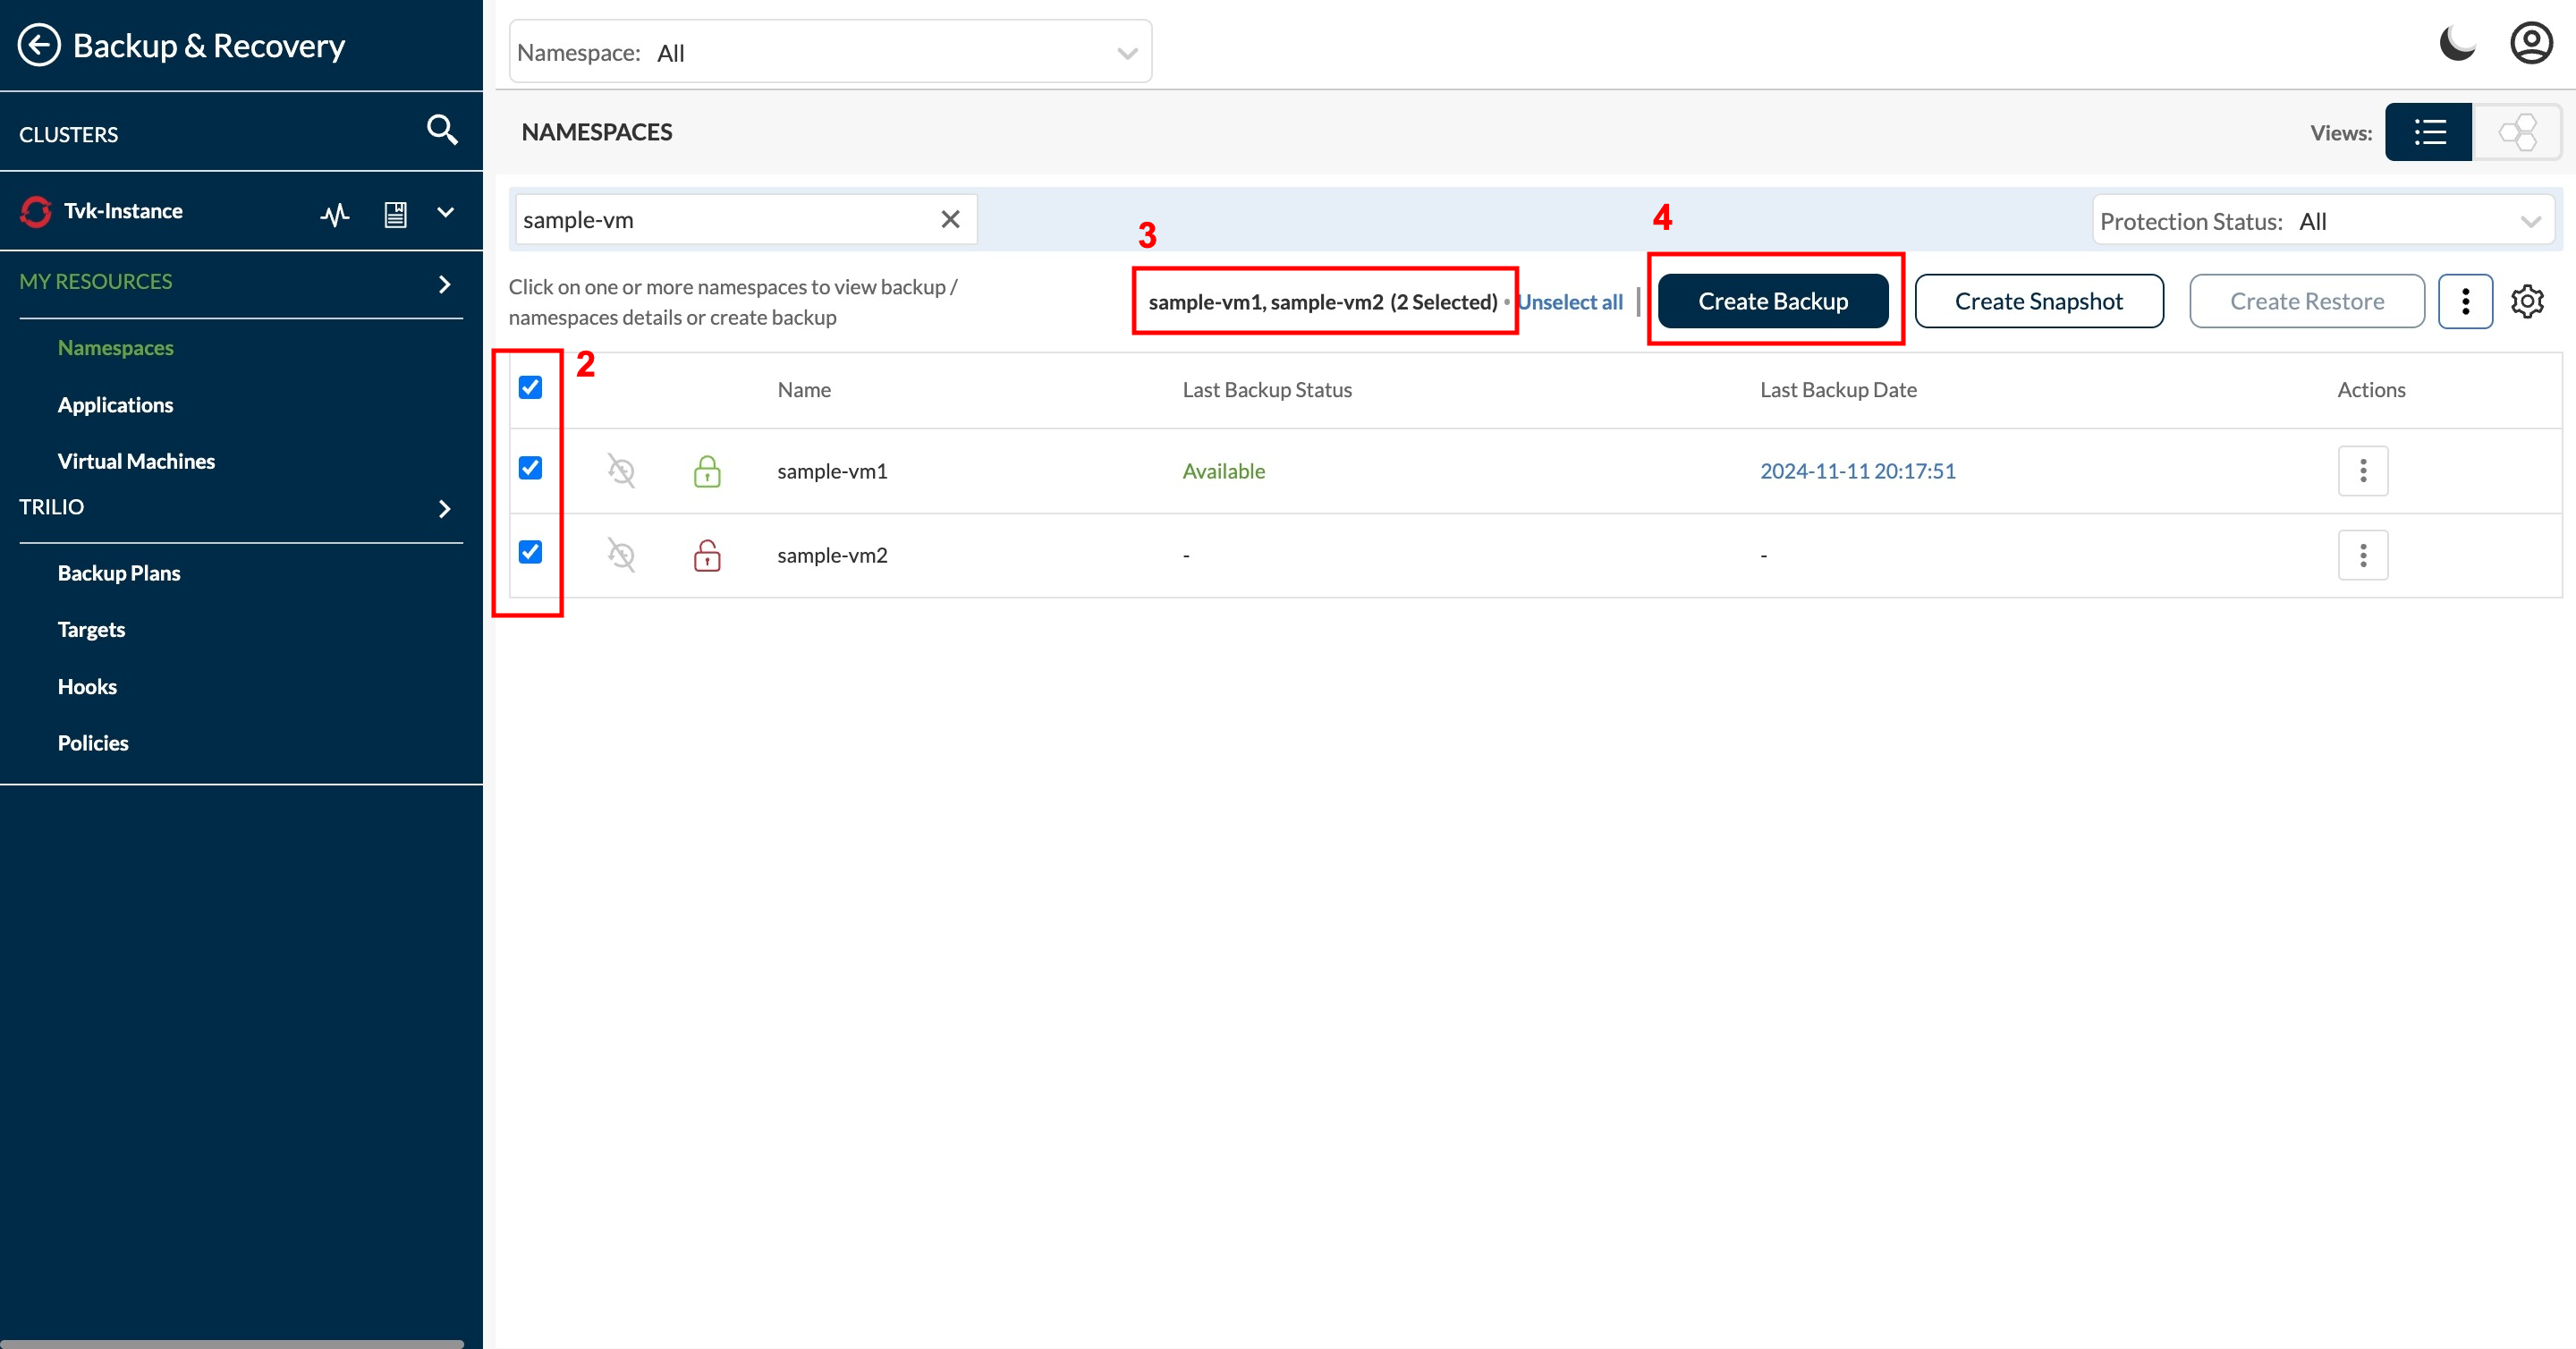
Create Backup selection
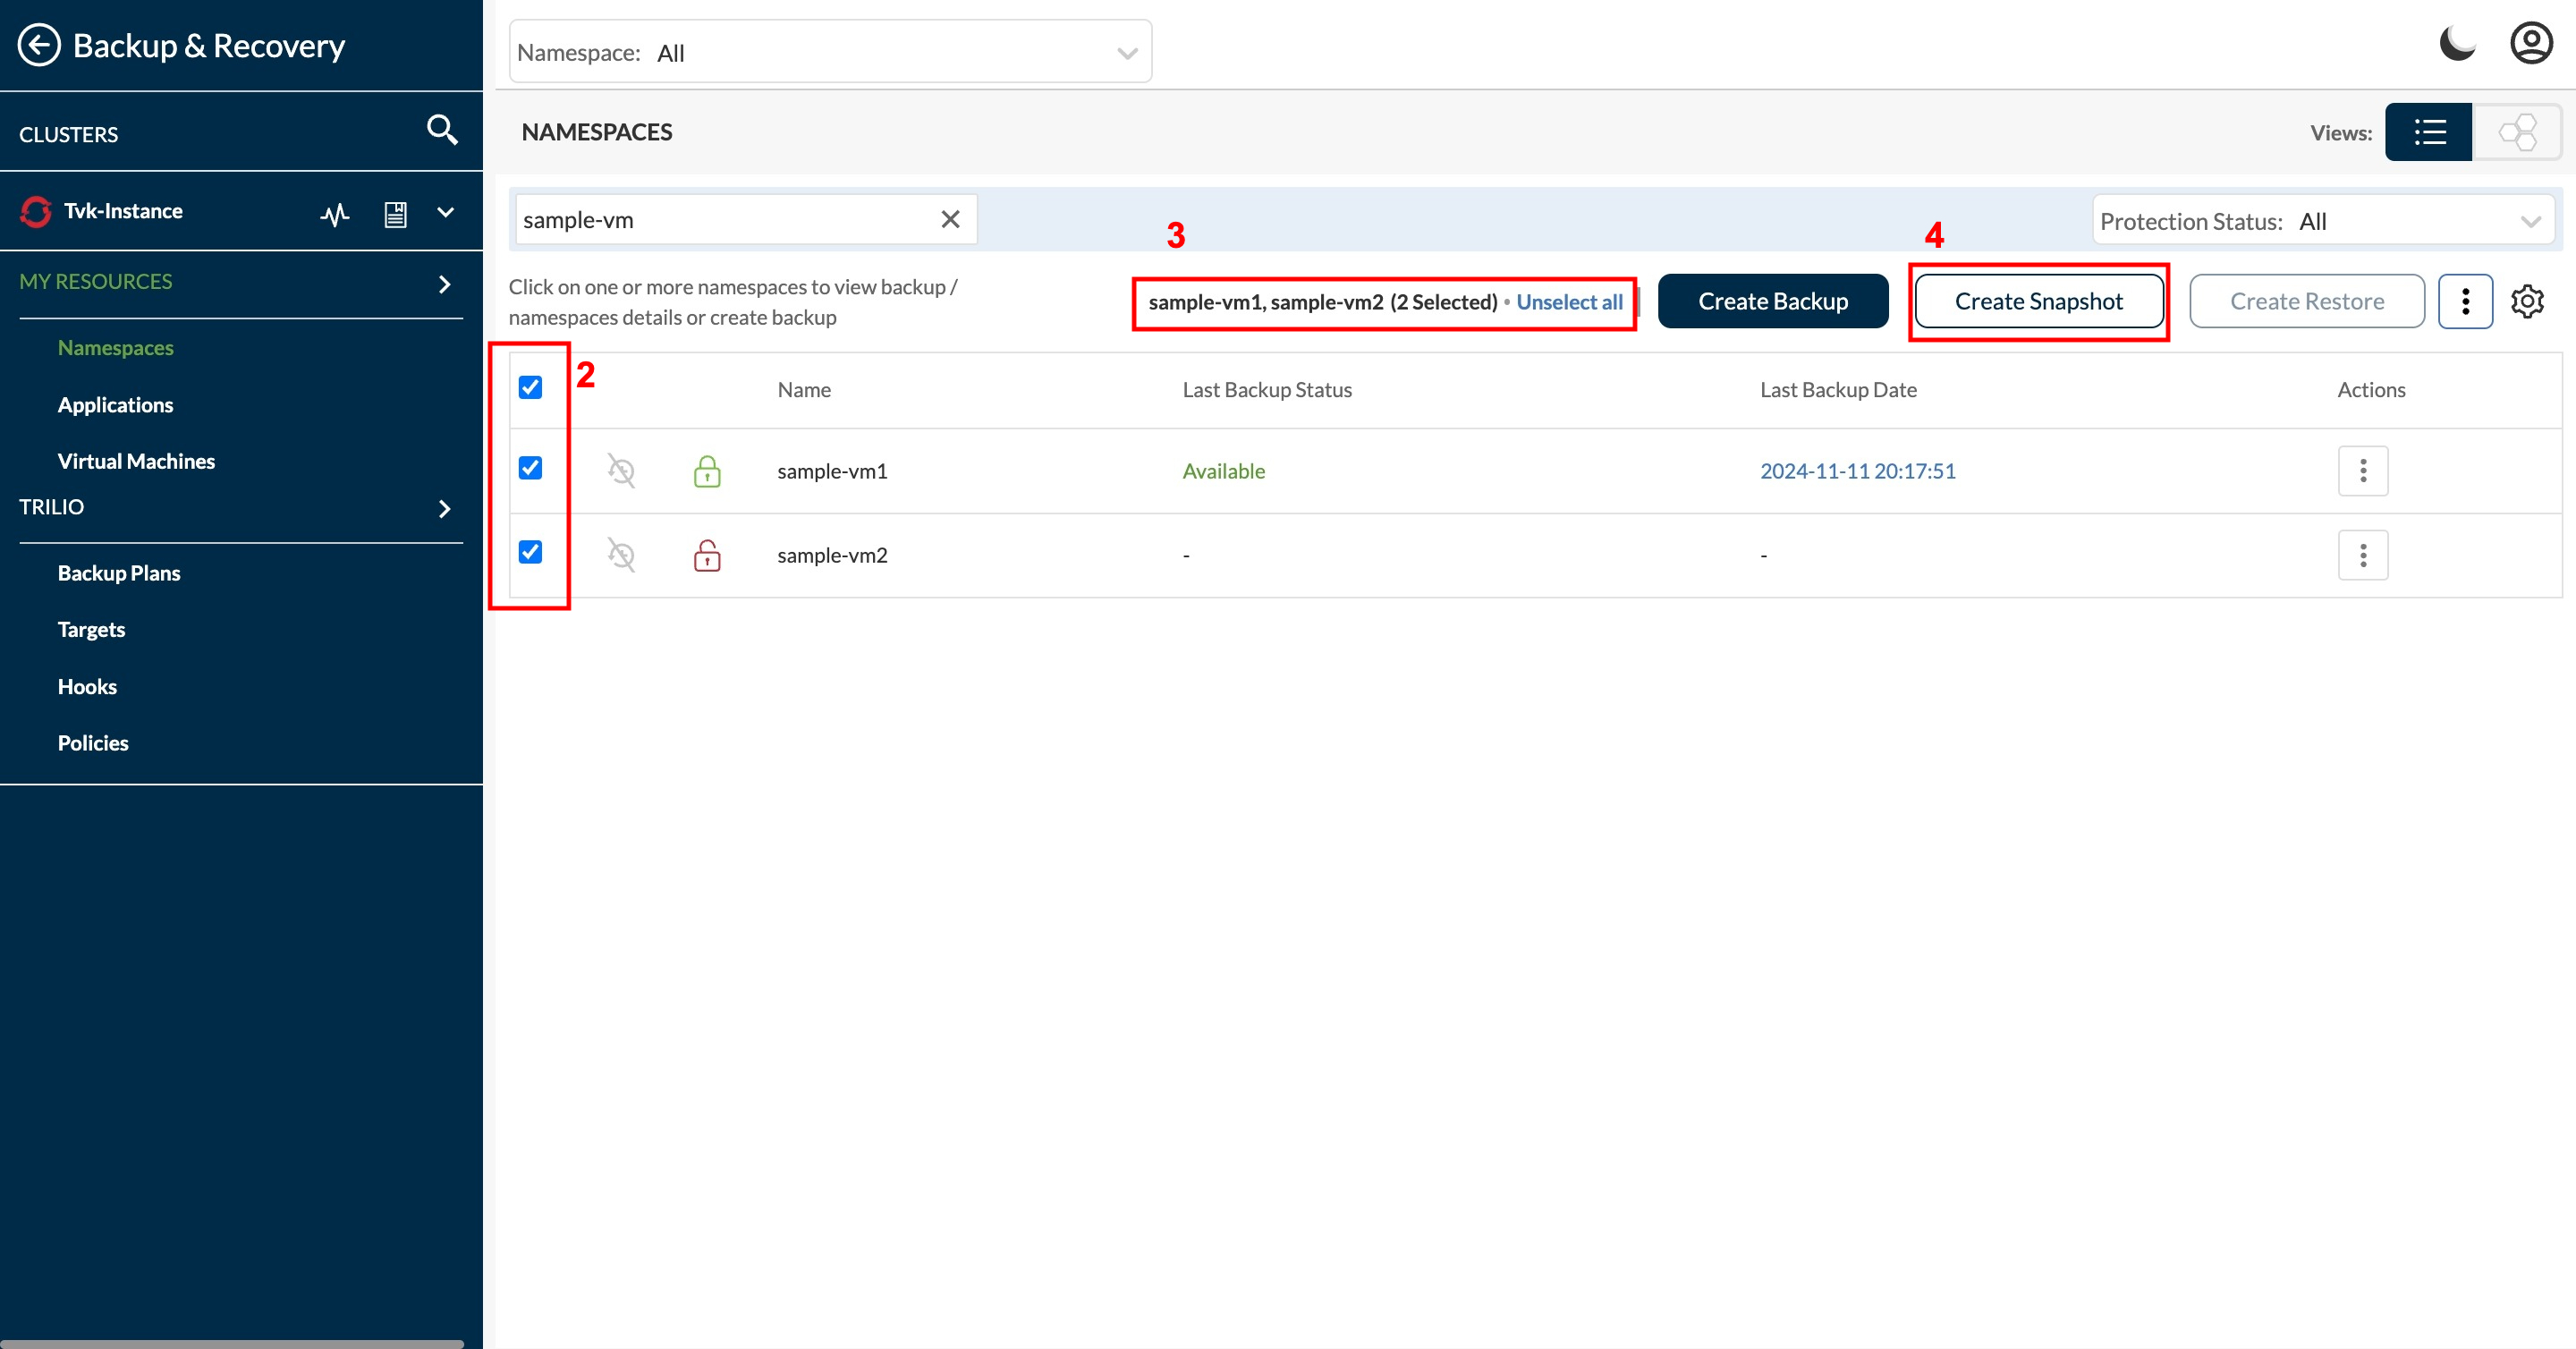
Create Snapshot selection
Create Backup selection
Create Snapshot selection
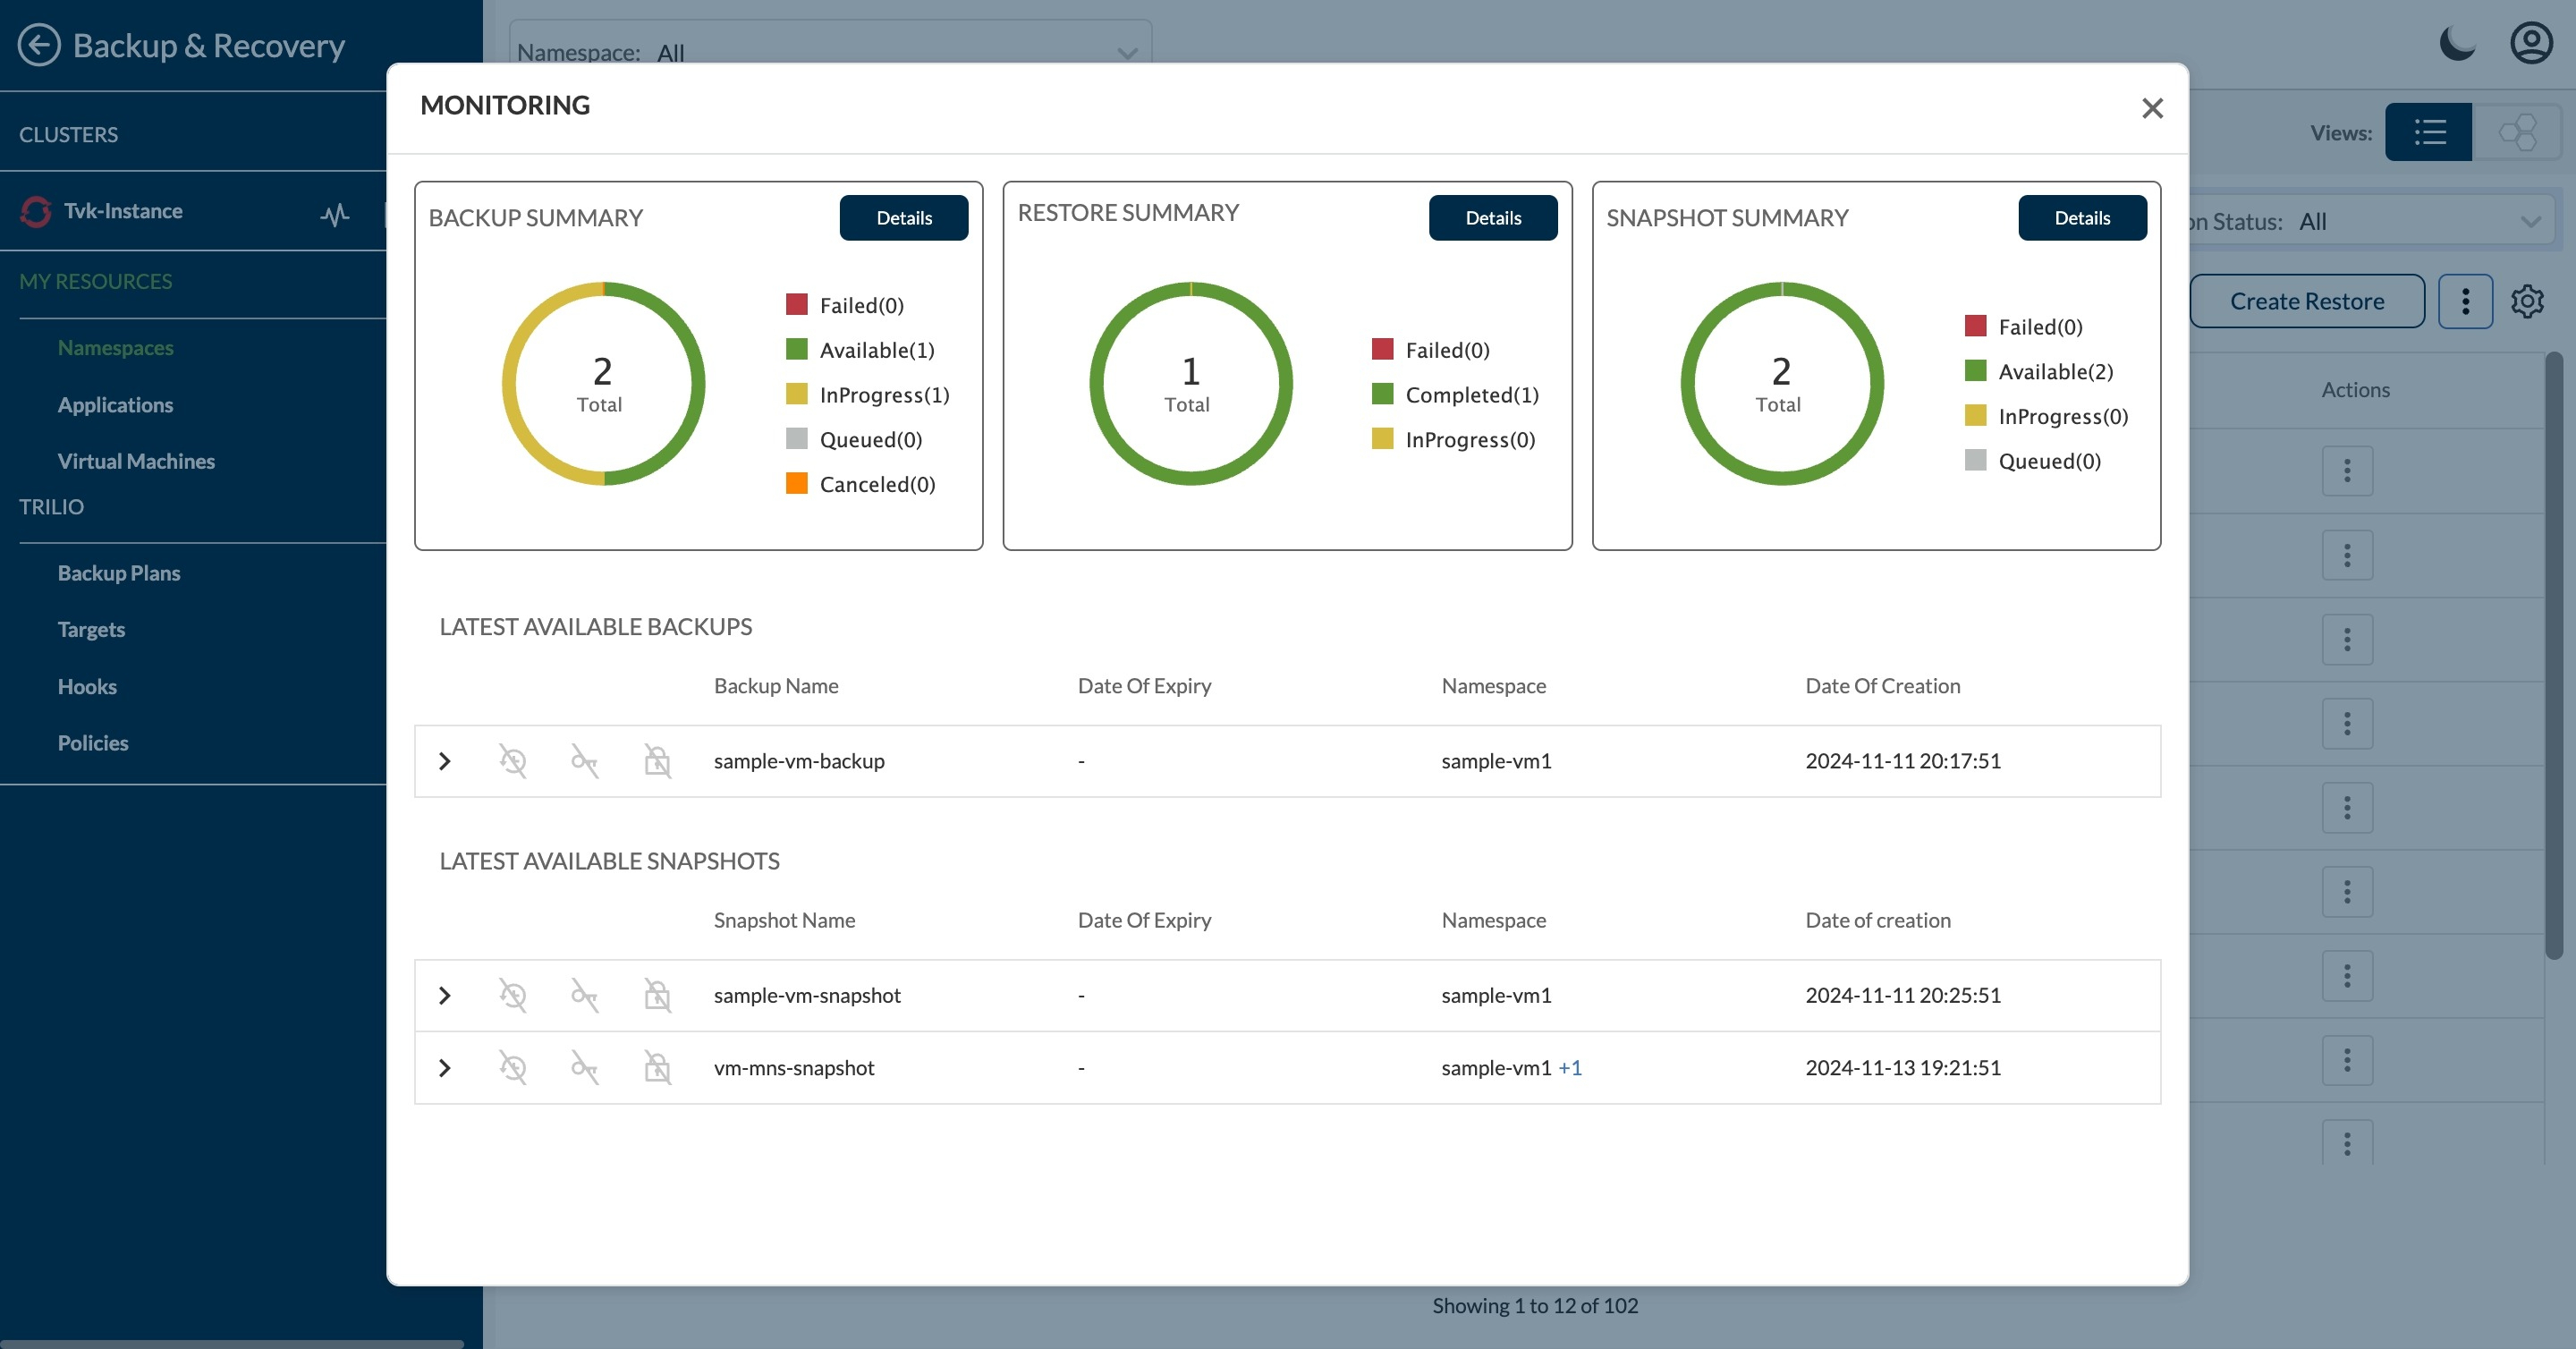
Latest available Snapshots
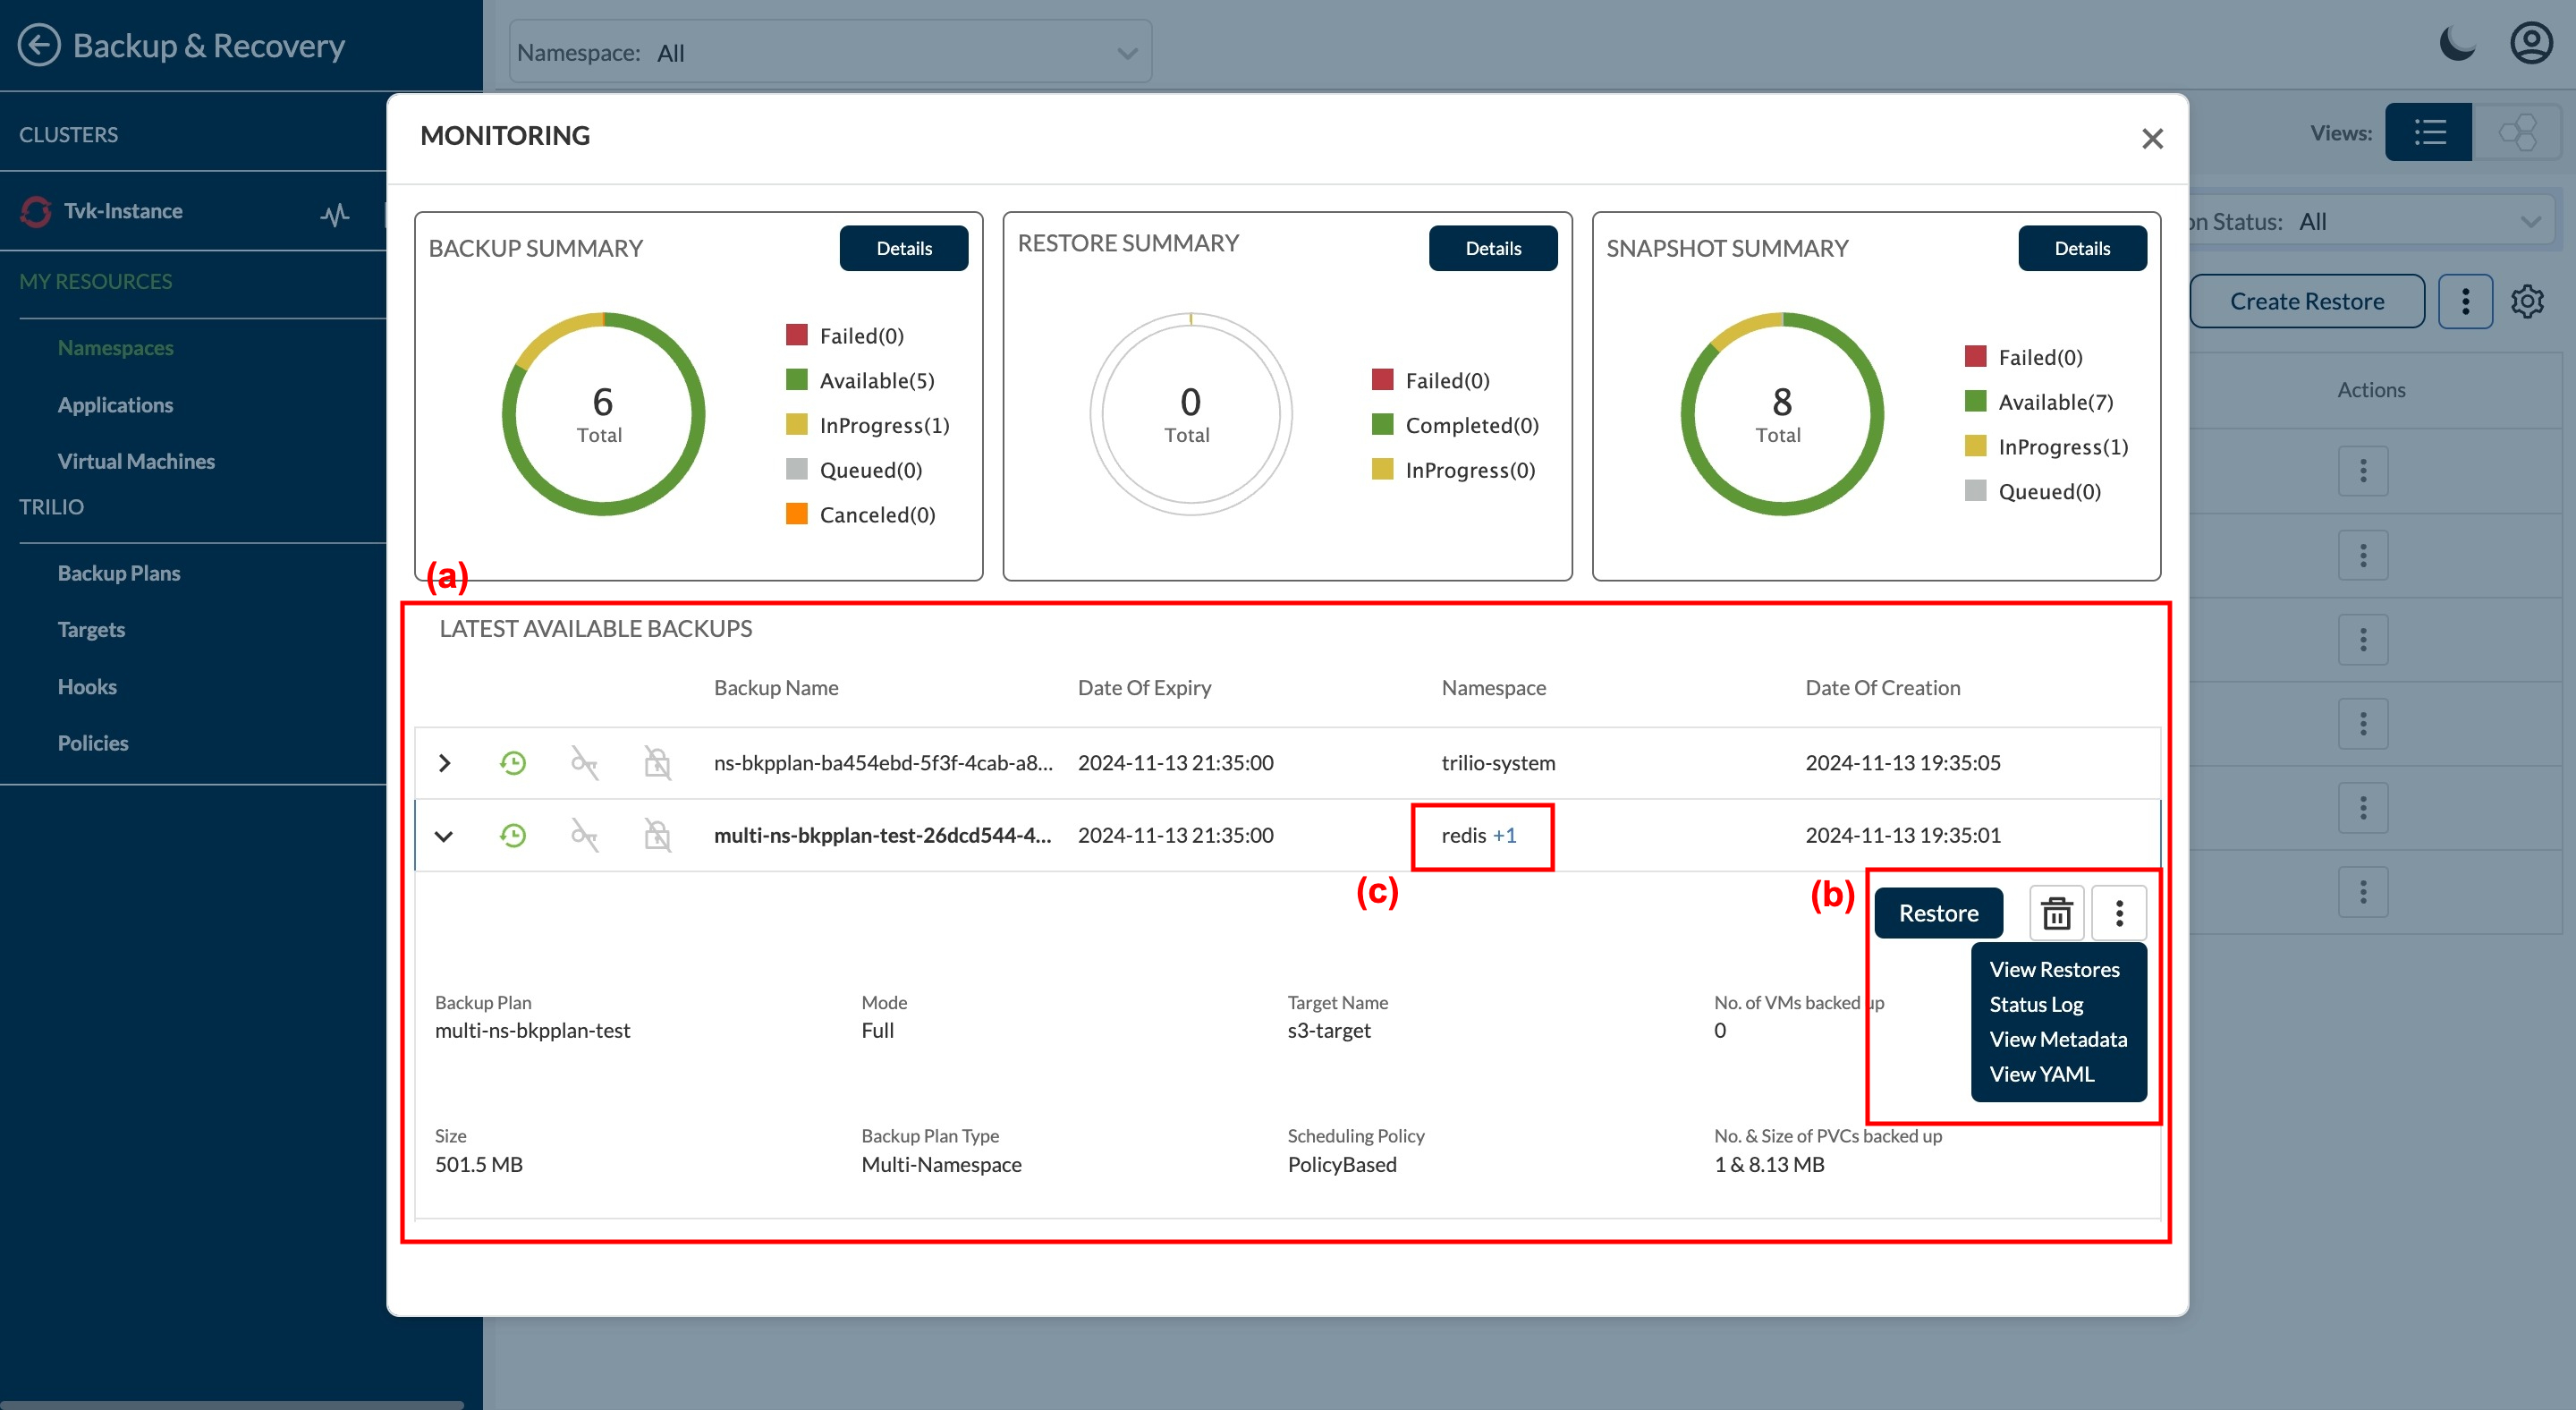
Latest available Backups
| Field No. | Description |
|---|---|
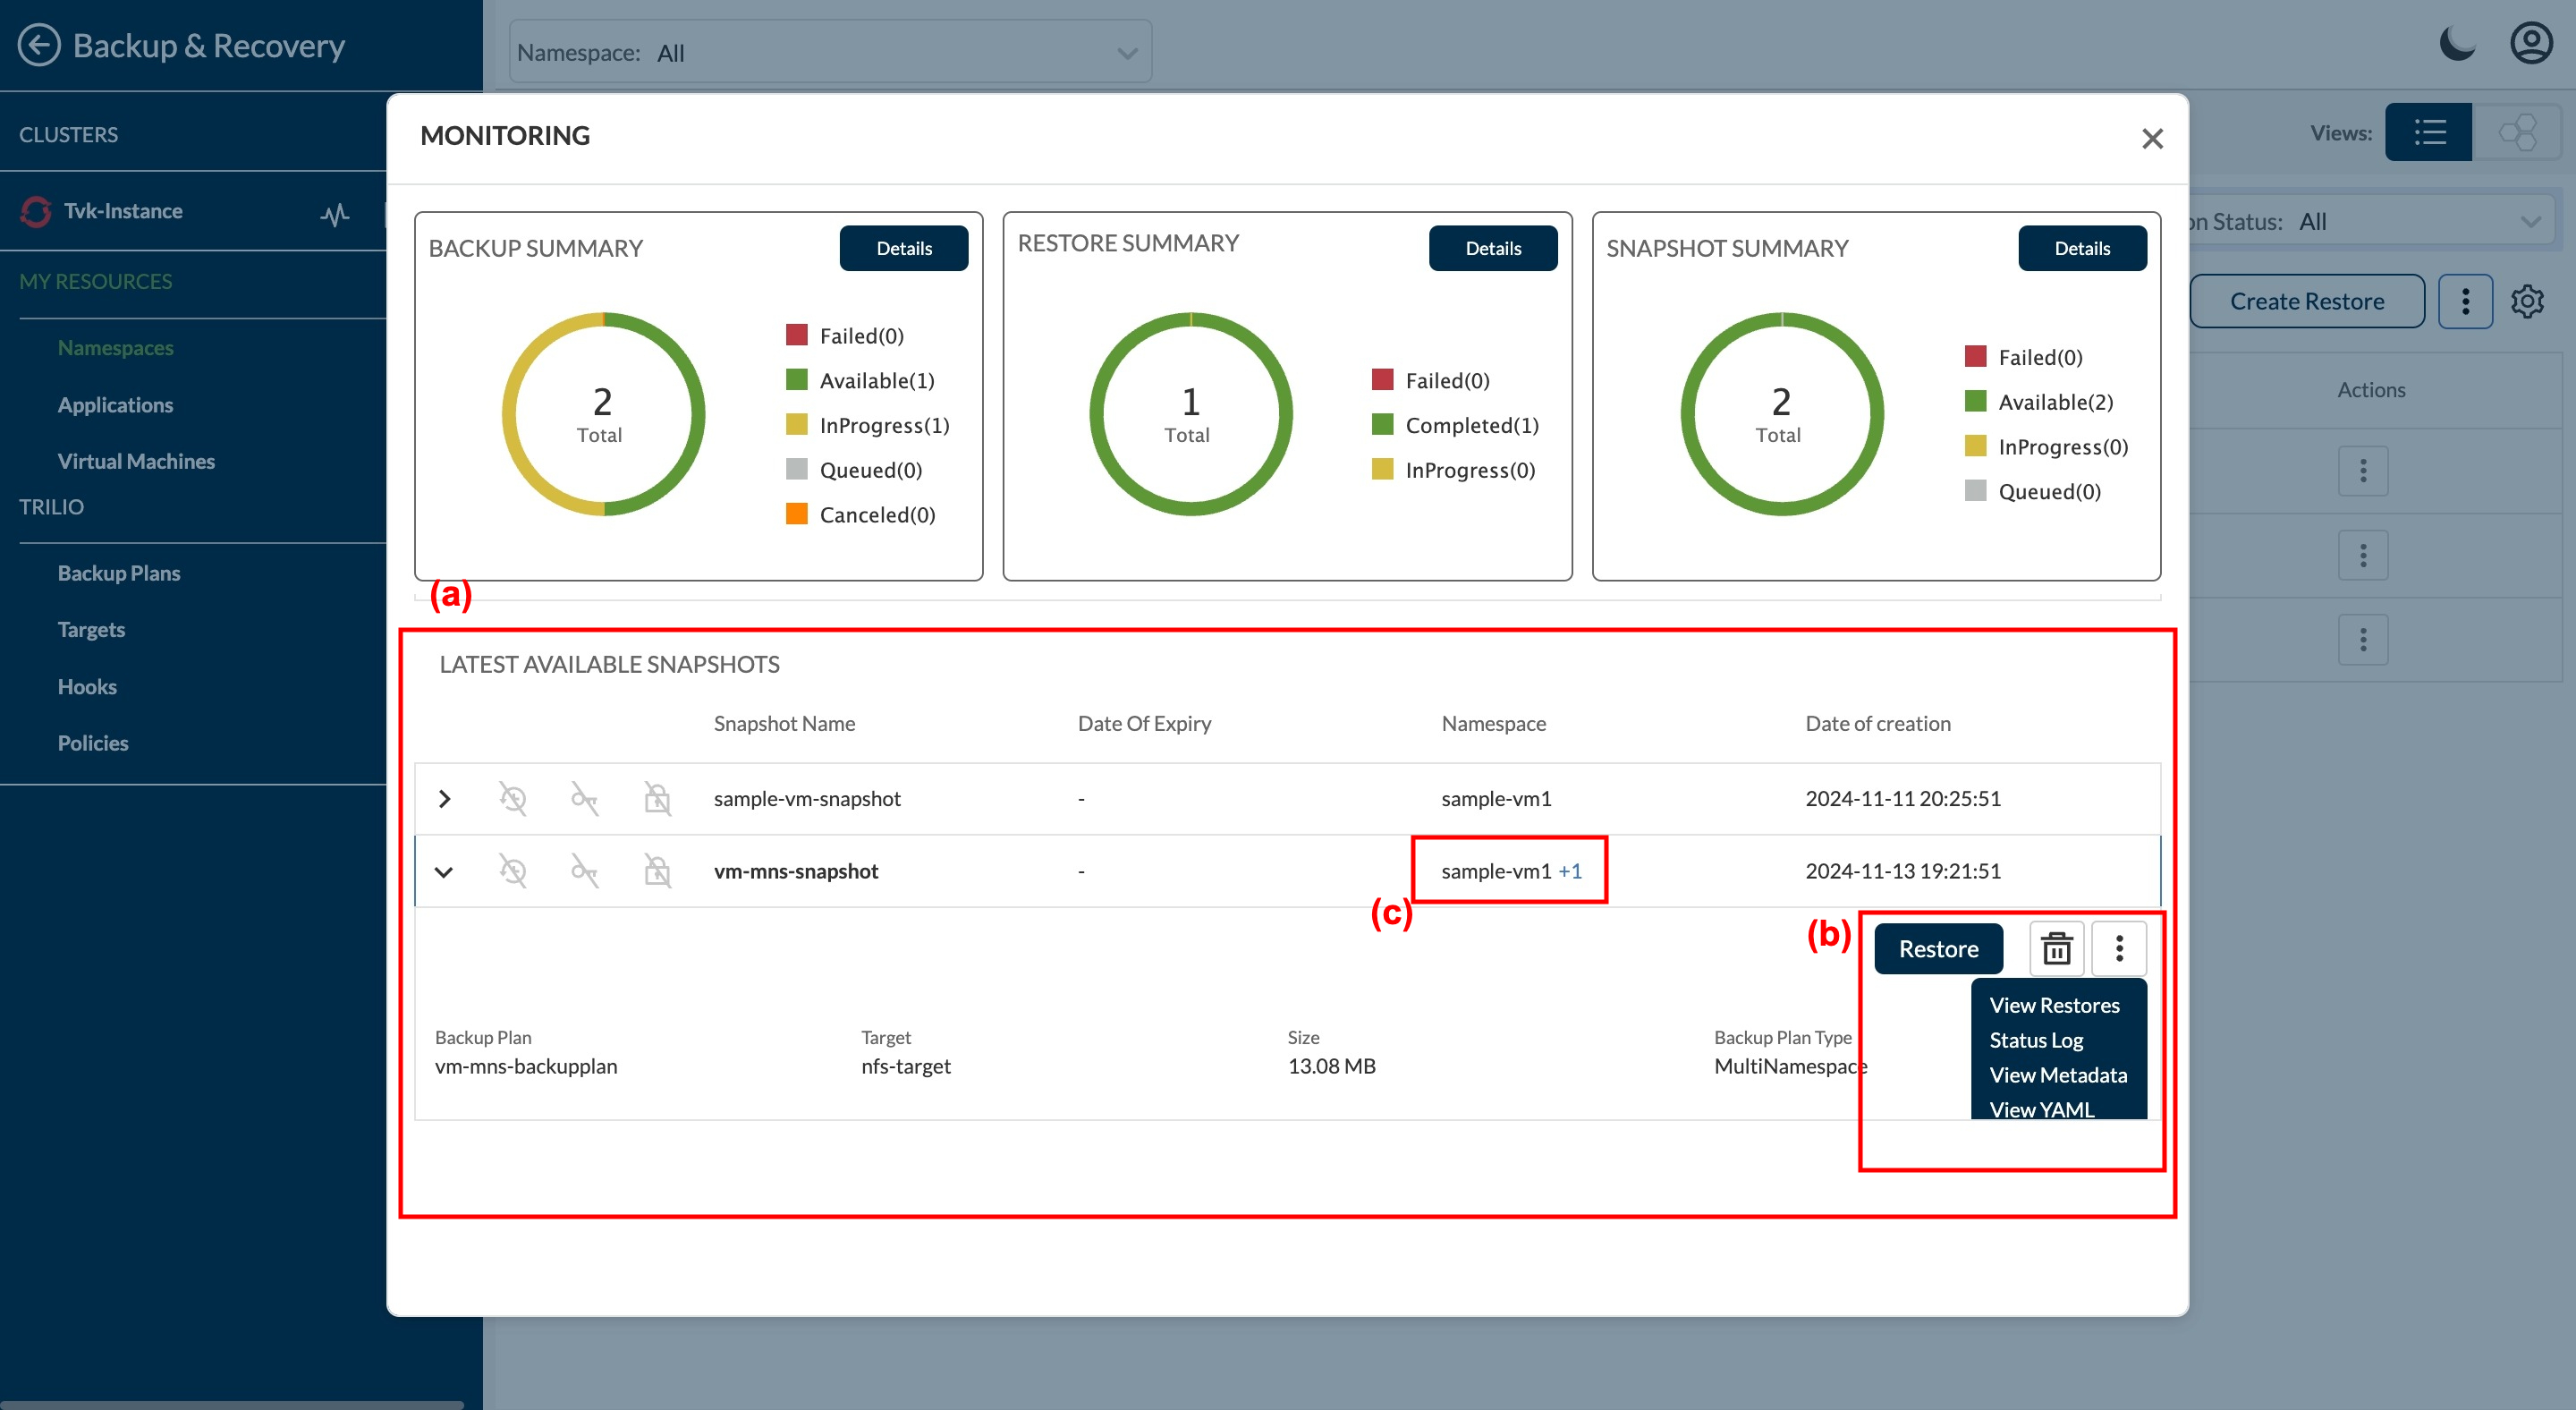
| a | This table lists the latest Available Backups and Snapshots of selected Namespace and the other columns provides data about those Backup and Snapshots. |
| b | Click on any Backup or Snapshots expand icon in the table for more details, such as: - Restore - View Restores - Status Logs - View Metadata - Delete - View YAML |
| c | This shows the first namespace and the number of other namespaces selected, or from which the backups and snapshots were created. |
| Field No. | Description |
|---|---|
| a | This is the number of namespaces selected. |
| b | These numbers show how many namespaces are protected and how many are unprotected. |
| c | This lists each namespace and shows if it is protected or unprotected. |
| d | On click on this user redirects to GVK visibility page for that particular Namespace. |
| Field No. | Description |
|---|---|
| i | Shows the selected namespace name. |
| j | Shows the available GVK resources from the Namespace. |
| k | On click on this user redirects to see the available resources of selected Group. |
| Field No. | Description |
|---|---|
| m | Shows the selected namespace name. |
| n | Shows the name of selected GVK from step 5. |
| o | On click on this user see the YAML files of the resources. |
| Field No. | Description |
|---|---|
| a | The total space consumed by all selected targets for both all and object store targets.. |
| b | This table lists shows the targets selected of selected Namespace with following columns - Status - Target Name - Type - Space Available - Vendor - Space Consumed |
| c | On click on setting icon user can manage the columns visibility in listing. |